Product Photography for Cosmetics: The Amazon Conversion Playbook
March 15, 2026
Product Photography for Cosmetics: The Amazon Conversion Playbook
Your cosmetic photography is failing because you’re treating it like a creative project. It’s not. It’s a conversion tool.
On Amazon, your images are the single biggest driver of clicks and sales. Before a customer reads a single word of your copy, your photos have to visually dismantle their skepticism and prove what your product delivers. Images sell first; copy sells second. They are the primary lever for improving performance on Amazon.
Why Your Cosmetic Photography Fails on Amazon
Let’s be blunt. Most cosmetic product photography on Amazon is a costly exercise in missing the point.
Sellers get hung up on creating premium-feeling lifestyle shots. They obsess over brand aesthetic, the model, the props—but they completely ignore what an Amazon image gallery is actually for: answering questions, crushing objections, and driving a confident "Add to Cart."
This approach is fundamentally broken.
A shopper scrolling Amazon for a new foundation isn't looking for art. They're looking for a solution. They have unspoken questions running through their head: Will this shade match my skin? Is it going to look cakey? Will it make me break out? Is this really worth the price?
The Conversion Disconnect: The Most Common Mistake
The most common mistake sellers make is prioritizing generic beauty shots over visuals that actually sell. A stunning model holding your product is nice, but it does absolutely nothing to answer critical buyer questions.
It's a complete waste of prime digital real estate. That space could have been used for an infographic showing your non-comedogenic ingredients or a macro shot proving your serum has a lightweight, non-greasy texture.
This disconnect has clear consequences for your Amazon metrics:
- Low Click-Through Rate (CTR): Your main image looks like every other one, failing to signal a clear benefit that stops the scroll.
- High Bounce Rate: Shoppers click, scan your images for answers, don't find them, and leave instantly.
- Poor Conversion Rate (CVR): Without visual proof to back up your claims, shoppers lack the confidence to buy.
Your images are not a gallery to be admired. They are a visual sales pitch, engineered to answer questions, build trust, and close the sale. Each of your image slots has a specific job.
Your images are not a gallery to be admired. They are a visual sales pitch, engineered to answer questions, build trust, and close the sale. Each of your image slots has a specific job.
The New Competitive Landscape
Strategic cosmetic photography is more urgent than ever. The massive growth spurt in the global beauty industry is slowing—projected to hit just 5% in 2025.
This means the days of riding a wave of market growth are over. Success now requires stealing market share directly from competitors through superior conversion tactics. As growth flattens, click-through and conversion rates are the only metrics that matter. You can get more insight into this shift over on Launchmetrics.com.
Ultimately, your images are a force multiplier. Get them right, and your PPC campaigns become more efficient, your organic rank climbs, and you can justify a higher price. Get them wrong, and you're just paying Amazon for traffic that never converts.
Building a Research-Driven Shot List
Stop guessing. A shot list based on brainstorming what "looks good" is a fast track to wasting money on a listing that won't convert. Your shot list must be a strategic blueprint, engineered from real customer data before a camera is ever picked up.
This isn’t about creativity. It’s about systematically finding and destroying every reason a customer might hesitate to buy. Your goal is to build an image gallery where every single photo has a specific job, derived directly from what your target audience is already telling you. The best place for this intel is your competitors' listings.
Mine Customer Reviews and Questions
Go to the top three listings for your direct competitors. Skip the five-star reviews—they offer zero insight. The real gold is in the two, three, and four-star reviews. This is where you find the friction, skepticism, and real-world problems.
Look for patterns. Are customers constantly asking if a foundation oxidizes and changes color? Are they confused about the true shade of a lipstick under different lights? Do they complain that a cream marketed as "hydrating" feels greasy?
These are not just complaints; they are your shot list directives. Each recurring question is a visual problem your photography must solve.
While you're there, dig into the Q&A section on those same listings. These are questions from shoppers on the edge of buying who have one last doubt. If multiple people ask, "Is this product tested on animals?" or "How much product is in this tiny jar?" you've found a critical piece of information that needs its own dedicated image.
Define a Job for Every Image
Once you have a list of the top 6-8 objections and desired outcomes, you can move beyond the basic "hero, lifestyle, back of box" model. Now, you assign a specific, conversion-focused task to each image slot. This is how you avoid the common failure loop where creative ideas not based on research lead to bad photos and worse sales.
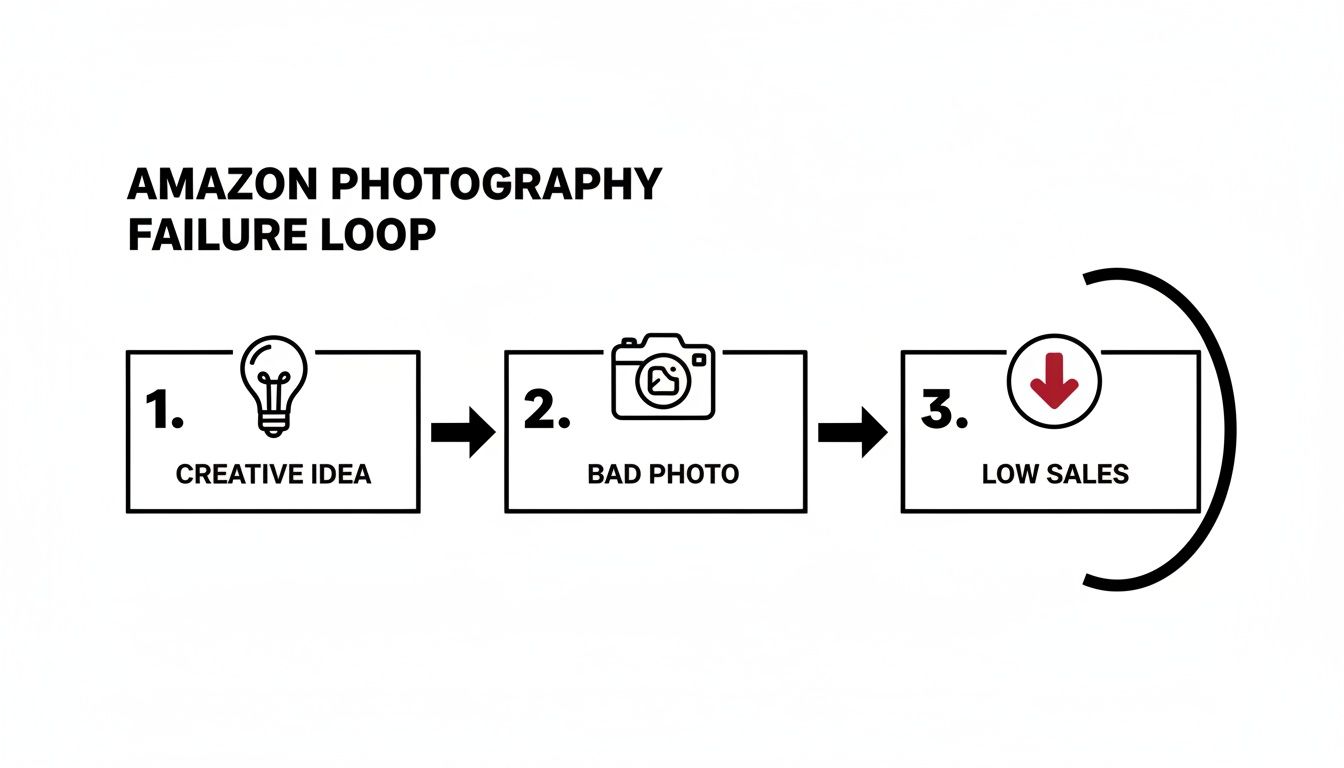
This process shows how unstrategic photography kills sales performance. A research-driven approach breaks this cycle by ensuring every image has a clear, data-backed purpose.
This transforms your shot list from a vague wish list into a precise plan of attack. Your secondary image plan might look something like this:
- Image 2: Shade Accuracy. Show swatches on three different skin tones under neutral lighting to answer the "Will this match me?" question head-on.
- Image 3: Texture & Absorption. A macro shot showing the lightweight texture of a cream melting into the skin, proving it's "non-greasy."
- Image 4: Key Benefit Infographic. Visually call out the top 3 benefits you found in the reviews (e.g., "All-Day Wear," "Fragrance-Free," "Non-Comedogenic").
- Image 5: Value Proposition. A simple graphic showing the size of your product next to a smaller competitor's, justifying your price.
- Image 6: Trust & Safety. Display the "Leaping Bunny Certified" logo prominently to handle cruelty-free objections.
- Image 7: Before & After. A clear, realistic before-and-after shot demonstrating the product's main result, like visibly reducing redness.
A shot list isn't a checklist; it's a sales script. If an image doesn't directly counter an objection or prove a key benefit, it has no place in your listing. It's just taking up space that a competitor is using to close a sale.
A shot list isn't a checklist; it's a sales script. If an image doesn't directly counter an objection or prove a key benefit, it has no place in your listing. It's just taking up space that a competitor is using to close a sale.
This research-first method ensures your product photography cosmetics isn't just pretty—it's a high-performance conversion machine. It turns your listing into a visual problem-solver that gives shoppers the confidence they need to click "Add to Cart." For a deeper look at how this research process works across all product categories, read our complete guide to research-driven Amazon product photography. By starting with data, you end with sales.
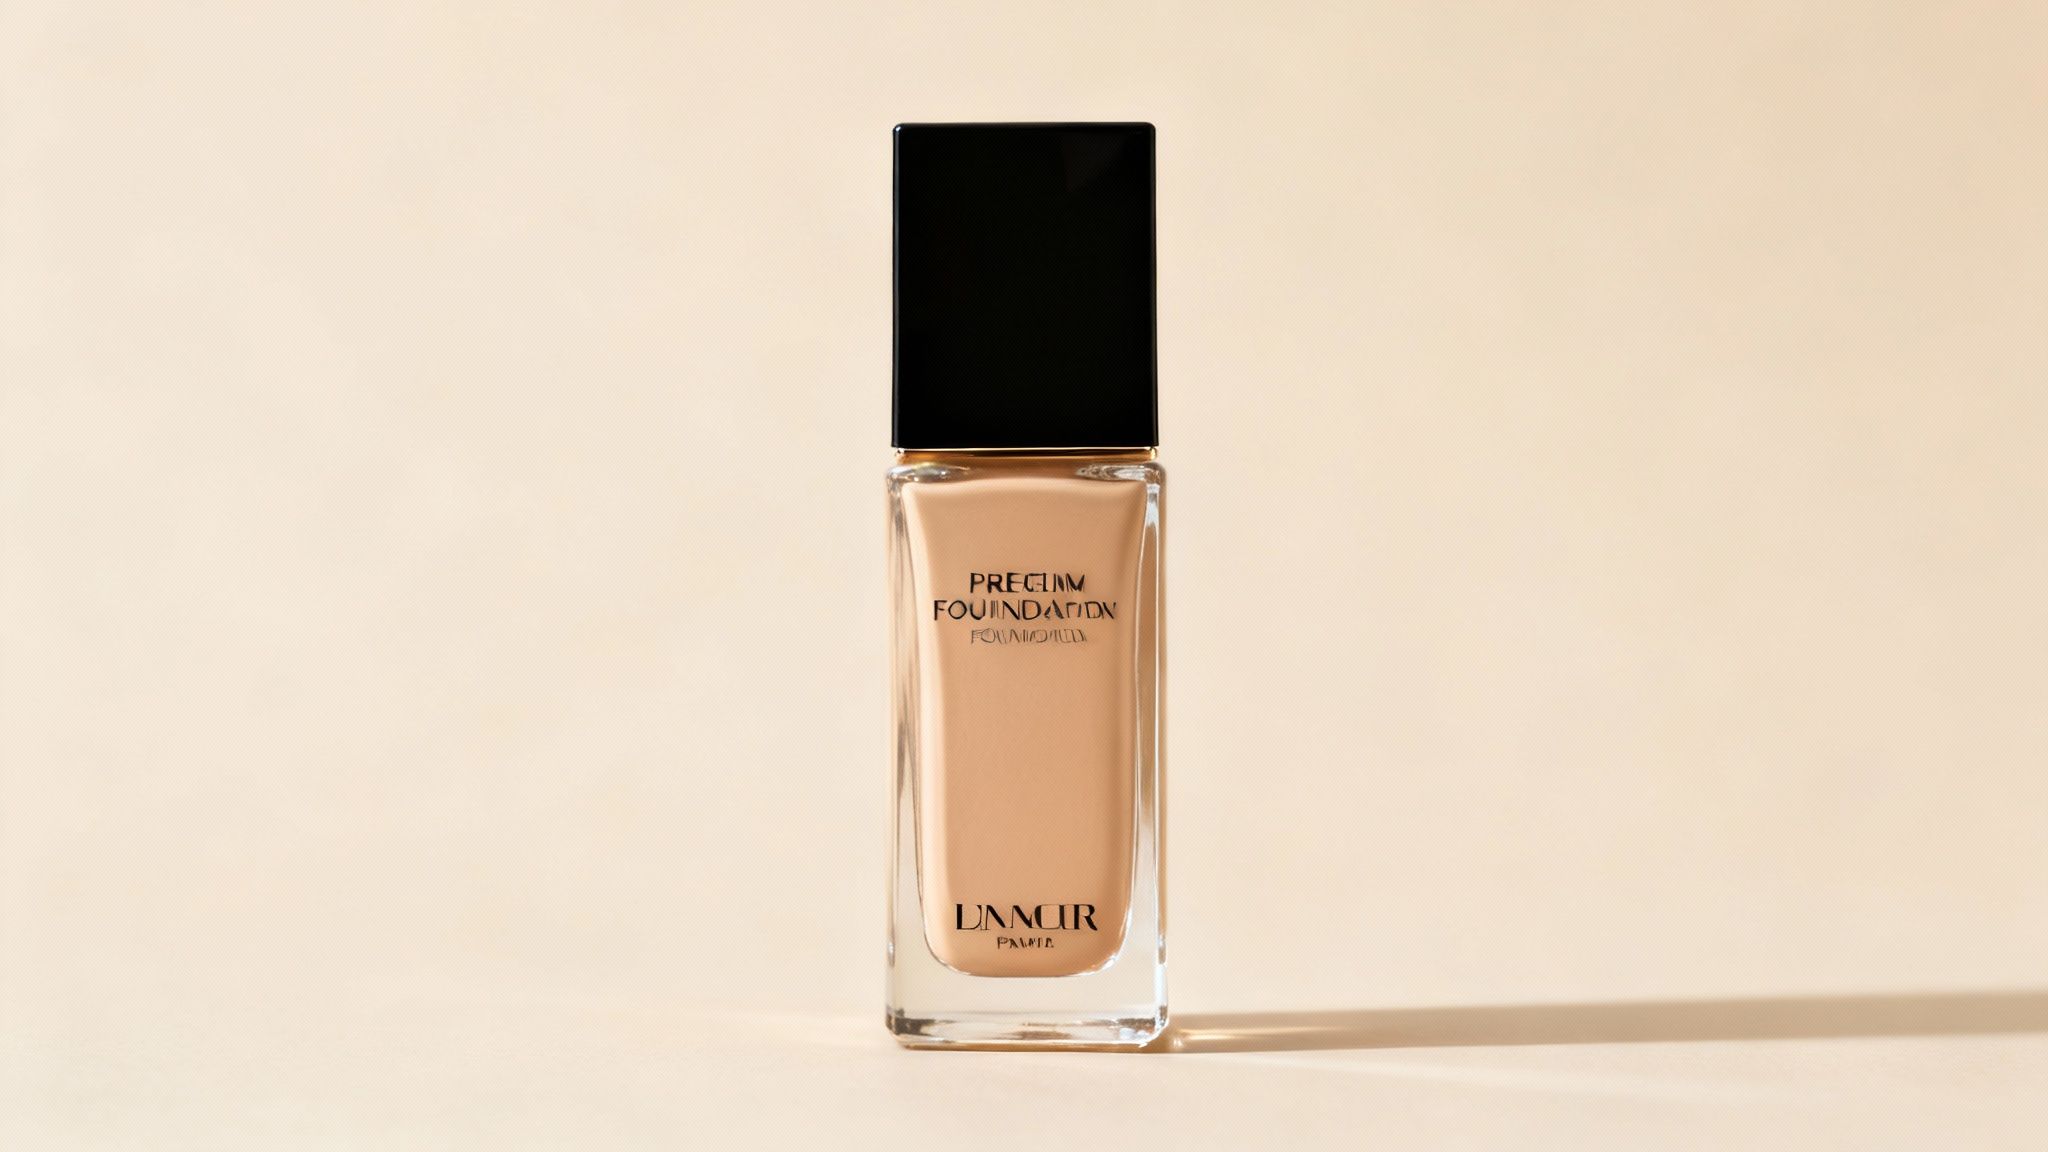
Nailing the High-Converting Hero Image
Your hero image is the single most important photo on your Amazon listing. It's not just a picture; it's your primary sales lever in a sea of search results. A sharp, perfectly lit hero shot is what earns you the click over a competitor. Everything else is secondary.
The goal is instant recognition. A shopper scrolling on their phone needs to know exactly what your product is, its size, and what it does in less than a second. This is not the place for artsy props or dramatic shadows. It is about pure, unfiltered product communication.
Mastering Light for Tricky Cosmetic Packaging
Cosmetic products are notoriously difficult to shoot. Their packaging—often glossy, reflective, or transparent—is a minefield of glare, reflections, and color issues. Your lighting must be deliberate and controlled.
Soft, diffused light is non-negotiable. It wraps around the product, smooths out harsh hotspots, and shows detail without creating distractions.
- For Glass Bottles (Serums, Foundations): Use two large softboxes, one on each side at a 45-degree angle. This creates long, soft highlights that define the bottle’s shape without reflecting the entire studio.
- For Matte Tubes (Creams, Cleansers): A single large light source from above and slightly in front usually provides a clean, even look. Place a white bounce card below the lens to kick light back up and fill shadows under the cap.
- For Shiny Compacts (Powders, Eyeshadows): Diffusion is king. A light tent or a large diffusion panel between your light and the product is necessary to kill reflections. From there, it's about tiny adjustments to control where the remaining highlights land. Good lighting starts with effective product packaging designed to be photogenic.
Composition and Framing for Mobile-First Shoppers
Your hero image will mostly be seen as a tiny square on a phone. This demands a mobile-first approach. The product must fill at least 85% of the frame, leaving minimal white space. This maximizes its impact in search results.
Keep the composition simple and strong. Dead center. For a single item, a straight-on shot is almost always the right call. If including the box, tuck it slightly behind and to the side to create depth, but the product itself must remain the star. Avoid dramatic angles—they can distort the product's perceived size and confuse the buyer.
A cheap-looking hero image signals a cheap product. Blurriness, bad lighting, or off-colors scream to a beauty shopper that your brand doesn't care about details. This one image can kill trust before they even click.
A cheap-looking hero image signals a cheap product. Blurriness, bad lighting, or off-colors scream to a beauty shopper that your brand doesn't care about details. This one image can kill trust before they even click.
Color and Sharpness: The Non-Negotiables
In cosmetics, color accuracy is everything. If your "Cherry Red" lipstick shows up looking like "Muted Coral," you're engineering bad reviews and returns.
How to lock in perfect color:
- Use a Color Checker: At the start of every shoot, take a reference shot with a color checker passport. This allows you to build a custom camera profile in post-production for spot-on colors.
- Use Good Lights: Your lights need a high Color Rendering Index (CRI) of 95+ to ensure they render colors truthfully.
- Calibrate Your Monitor: Editing on an uncalibrated screen is just guessing. What looks right to you could be completely wrong for your customers.
Finally, the image must be tack sharp from front to back. A tripod is mandatory to eliminate camera shake. Shoot at a mid-range aperture, like f/8 or f/11, to get a deep depth of field that keeps the entire product in focus. The text on the label, the texture of the cap—it all has to be crisp. This technical precision is what builds buyer confidence.
How to Craft Secondary Images That Sell
The hero image earns the click. The rest of your images earn the sale.
If a shopper makes it past your main image, they are actively looking for reasons to either buy or move on. Your job is to use the next six image slots to build such a compelling visual argument that buying becomes the only logical choice.
This is where you move beyond pretty pictures and start surgically dismantling the specific objections you found during your research. Every image needs a clear, conversion-focused job. Wasting a slot on a generic shot is like leaving cash on the table.
Here's a framework for how to think about each image slot for maximum impact.
| Strategic Secondary Image Types for Cosmetics || :--- | :--- | :--- | :--- || Image Slot | Image Type | Core Purpose | Key Elements to Include || 2 | Infographic (Benefits) | Show what it does for the customer | Visual callouts of 2-3 key benefits (e.g., "Deep Hydration," "Reduces Redness"). Use icons and minimal text. || 3 | Infographic (Problem/Solution) | Address a specific pain point | Show a "before" of the problem (e.g., dry skin) and an "after" showing the product's result. || 4 | In-Use / Texture Shot | Show what it feels like | Macro shot of the product's texture—a serum drop, a cream swatch. Prove the sensory experience. || 5 | Ingredient Story / Differentiator | Explain why it works or is better | Showcase a key ingredient or visually compare your product size/feature to a competitor's. || 6 | How-To / Application Guide | Remove user confusion | Simple visual steps showing how to apply the product correctly for the best results. || 7 | Trust Builder / Social Proof | Reduce risk and build confidence | Highlight key certifications ("Cruelty-Free," "Dermatologist Tested") or a branded guarantee. |
Each of these image types is a tool. Using them in a deliberate sequence guides the customer from interest to purchase without them ever needing to read your description.
Design Infographics That Answer Questions
Your customers are skeptical. Claims in your bullet points are weak; visual proof closes deals on Amazon. Well-designed infographics make your most critical benefits impossible to miss, even for a fast-scrolling mobile shopper.
Don't just list features. Turn benefits into punchy visual headlines. Instead of "Contains Hyaluronic Acid," your infographic should scream "Locks in Moisture for 12-Hour Hydration" next to a clean icon.
Use your review research to feed the content directly into these graphics. If people constantly ask if your foundation is oily, create an infographic with the bold text "Non-Comedogenic & Safe for Sensitive Skin." You're answering their biggest question before they ask it.
Reimagining Lifestyle and In-Use Imagery
The old-school "lifestyle" photo of a smiling model vaguely holding a product is dead. It’s useless. It tells the customer nothing important and wastes a precious image slot.
Shoppers are tuning out generic, influencer-style shots. One recent report showed that beauty-related earned media value on Instagram dropped a staggering 28% in just one quarter. This signals a huge shift away from staged "aspirational" content and toward visuals that prove a product's worth. You can read more about the evolution of the beauty industry and its marketing trends to see where this is all headed.
The new rule is to show, not tell. Your "lifestyle" shots must become hyper-focused "in-use" or "result-driven" images.
The new rule is to show, not tell. Your "lifestyle" shots must become hyper-focused "in-use" or "result-driven" images.
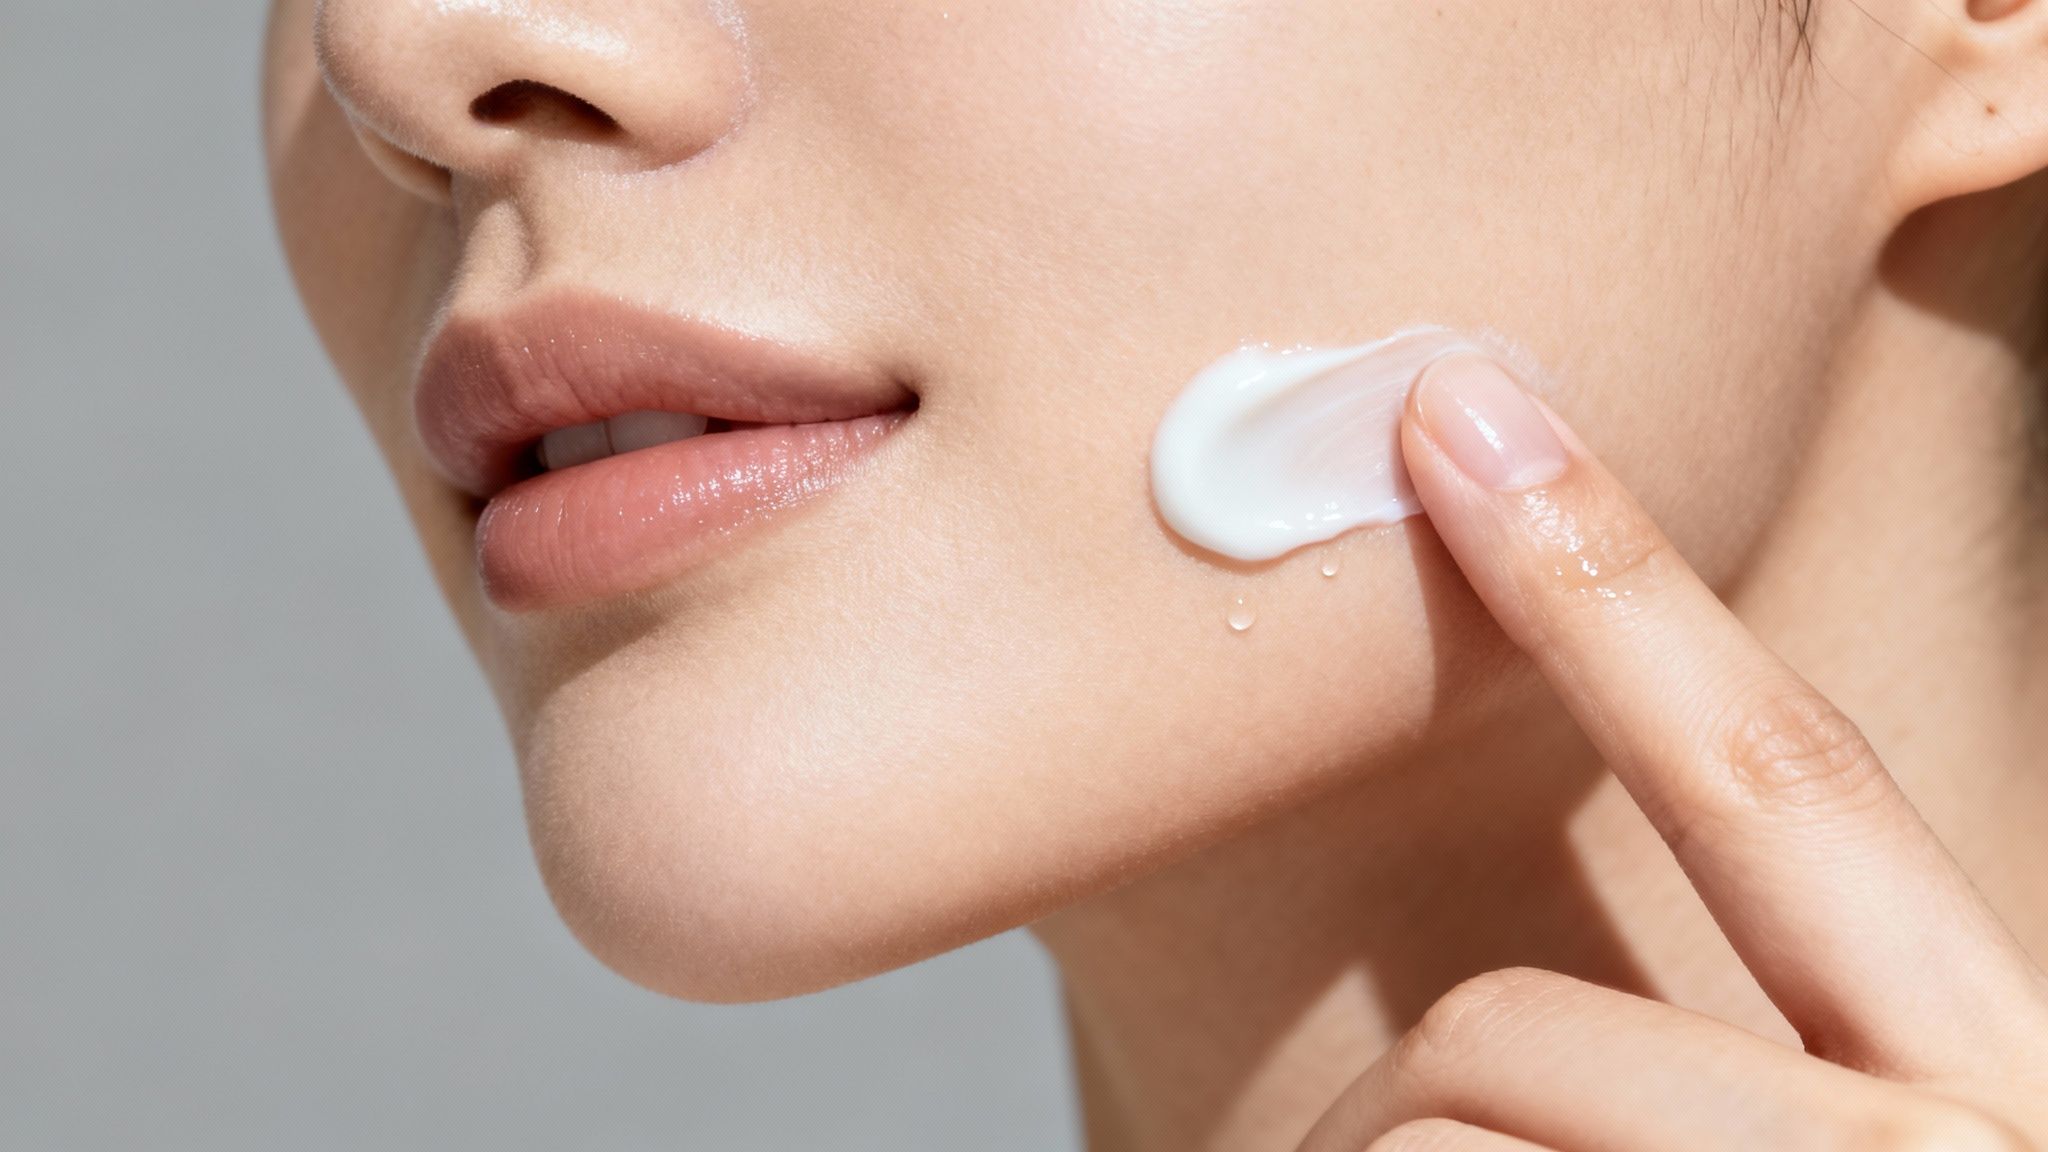
These shots are about demonstrating the real, tangible experience of using your product. Think differently:
- Texture Shots: A macro shot of a serum droplet on a fingertip, showing its lightweight viscosity.
- Application Shots: A tight close-up of a foundation brush seamlessly blending the product into the skin.
- Result Shots: A focused shot on lips, showing the true matte finish and vibrant color payoff of a lipstick. No guessing.
- Sensory Shots: A swatch of a rich body cream being smoothed onto an arm, visually communicating its thick, hydrating feel.
These product-centric shots build desire and answer critical questions about the user experience. They prove your product feels and performs as you claim, which is infinitely more powerful than another pretty picture. For a deeper breakdown of how to balance lifestyle and infographic images across your stack, see our guide on Amazon lifestyle and infographic images.
Visually Justifying Your Price Point
Your images must work together to justify your price, especially in the competitive cosmetics space. This is about demonstrating value—through superior ingredients, better formulation, or simply more product for the money.
A simple way to do this is with a comparison infographic. Show your bottle next to a smaller competitor's, with a clear callout like "30% More Product Than the Leading Brand." Instant value proposition.
Alternatively, create a visual ingredient story, showcasing the high-quality, ethically sourced botanicals in your formula. If your product has a unique applicator or innovative packaging, dedicate an entire image to it. Use callouts to explain why that feature gives the customer a better result.
Every secondary image is a chance to build trust and prove your product's worth. When each is designed to solve a specific customer problem, your image gallery becomes a relentless conversion engine.
Visually Proving Your Ethical and Natural Claims
If your brand is built on promises like "natural," "organic," or "cruelty-free," your product photography has one job: show, don't tell. Text claims are cheap. Cosmetics shoppers have been trained to be skeptical. Your images must be the visual evidence that turns brand values into a reason to buy.
For these customers, your ethical stance isn't a nice-to-have; it's the main reason they are considering your product. Fail to back it up visually, and you lose their trust—and the sale.

This isn't a niche market. The natural and organic sector is exploding. In fact, 60% of younger consumers admit they've dropped brands that didn't align with their values. For Amazon sellers, this means images that communicate your ethos are non-negotiable conversion tools. You can dig into data on the beauty industry's rapid changes to understand this shift.
Show the Source with Ingredient Photography
The fastest way to prove "natural" is to show the raw ingredients. This creates an immediate mental bridge between the product and its wholesome origin. But most sellers get this wrong.
The common mistake is dumping a pile of ingredients around the product, creating a cluttered mess. The execution must be clean, deliberate, and minimalist.
- Focus on one key ingredient. If your serum's hero is Vitamin C, place the bottle next to a few clean, fresh orange slices—not the entire produce aisle.
- Contrast texture and form. A sprig of lavender next to a smooth cream jar. A few coffee beans beside a dark eye serum. This creates a visual story far more compelling than words alone.
- Keep it clean. The background must stay neutral. The goal is to suggest purity and quality, not a chaotic farmers' market.
This approach makes an abstract claim like "made with natural ingredients" a concrete, believable visual.
Don't make the customer hunt for your ethical claims in the bullet points. Put them front and center in an infographic. Visuals get processed first; if your "Cruelty-Free" badge isn't in your images, a huge chunk of your target audience will never see it.
Don't make the customer hunt for your ethical claims in the bullet points. Put them front and center in an infographic. Visuals get processed first; if your "Cruelty-Free" badge isn't in your images, a huge chunk of your target audience will never see it.
Integrate Trust Seals and Certifications
Seals like Leaping Bunny, USDA Organic, or EWG Verified are massive trust signals. But slapping a low-res logo in the corner of an image looks amateurish. These symbols earned your customers' trust; present them with authority.
Dedicate an entire image slot to an infographic that highlights these logos. This isn't just about showing the badge; it's about framing it as a core pillar of your brand.
Follow clean design principles:
- Place the logo in the middle or top half of the image.
- Use a short, bold headline like "Certified Cruelty-Free" or "Formulated with Certified Organic Ingredients."
- Keep text to an absolute minimum. The logo is the hero.
This tactic elevates your certification from a footnote to a primary selling point, instantly satisfying the search criteria for a huge segment of conscious buyers.
Style Your Shots to Signal Your Ethos
The overall vibe of your product photography for cosmetics has to match your specific claims. Lighting, textures, and props all send subconscious signals. If they don't line up, you create distrust.
- For "Natural" or "Organic": Use soft, diffused natural light and earthy textures like stone, wood, or linen for backgrounds. Props should be raw ingredients or natural elements.
- For "Clinical" or "Dermatologist-Tested": Use clean, bright, and slightly harder light. Backgrounds should feel sterile—think white acrylic, light gray, or a subtle lab grid. Props are minimal, perhaps a single glass beaker.
- For "Vegan" or "Cruelty-Free": The focus is on purity. A minimalist approach with a clean white or soft pastel background is perfect. The images should feel fresh, light, and compassionate.
By consciously choosing an aesthetic that mirrors your brand's core values, you build a cohesive visual story. Your listing becomes a destination for shoppers who aren't just buying a product, but a brand that shares their principles.
Getting Your Final Images Amazon-Ready
All the strategic work you put into shooting can be undone by clumsy technical optimization. This is the last mile, the final quality check that separates pros from sellers whose listings are dead in the water.
Your workflow must be sharp and repeatable. Start with retouching, but don't get carried away. The goal is to clean up tiny distractions—a speck of dust, a scuff on the packaging—not to create a plastic-looking mess that shoppers can spot a mile away. Keep it real. Focus on natural color correction and sharpening so the product looks exactly like it will when it arrives.
Nail Amazon’s Technical Specs
Amazon’s rules are not suggestions. Ignoring them will get your images suppressed. Burn these specs into your brain.
- File Format: Always JPEG. It provides the optimal balance of image quality and small file size for the web.
- Color Space: Use sRGB. This is the web standard. Uploading in CMYK will result in incorrect colors and customer returns.
- Dimensions: Images must be at least 2000 pixels on the longest side. No exceptions. This is required to activate Amazon's zoom feature, which is non-negotiable for beauty buyers who want to inspect every detail.
A slow-loading image is a lost sale. While high resolution is needed for zoom, you must compress the JPEG properly. A bloated file will crush your conversion rate on mobile.
A slow-loading image is a lost sale. While high resolution is needed for zoom, you must compress the JPEG properly. A bloated file will crush your conversion rate on mobile.
Beyond just meeting Amazon's requirements, a basic knowledge of optimizing images for SEO can provide another small edge.
Get this final step right, or all the strategic work was for nothing. If you'd rather have a team that obsesses over this handle both the photography and the nitty-gritty optimization, you can see our process and place an order to get conversion-focused images in just a few days.
Common Questions from Cosmetic Brands
I get asked these questions constantly. The answers usually separate the brands that get traction on Amazon from the ones that can't make their listings convert.
How Many Images Do I Really Need for My Cosmetics Listing?
You need to use every single slot. All of them. Typically, that’s seven.
Thinking any are optional is a massive, costly mistake. Your hero image has one job: win the click. The other six images exist to close the deal.
Each of those secondary shots needs a specific, research-driven purpose. One should showcase the high-quality ingredients. Another needs to demonstrate the product's texture. A third must prove a key benefit with a sharp infographic.
Leaving an image slot blank is like a salesperson walking away from a customer mid-sentence. It signals you don't have a strong enough case for your product, and you can bet your competitors are using all their slots.
Leaving an image slot blank is like a salesperson walking away from a customer mid-sentence. It signals you don't have a strong enough case for your product, and you can bet your competitors are using all their slots.
Should I Use Models in My Cosmetic Photography?
Only if you are using them strategically to demonstrate a direct product benefit. They are not decorative props.
The era of the generic smiling model holding a bottle is over. That kind of image tells the customer nothing and wastes valuable digital real estate.
Instead, get tight on the result or the application. A close-up of lips showing the true matte finish of your lipstick? Powerful. A macro shot of a hand demonstrating the non-greasy feel of your lotion as it absorbs? That’s a smart, conversion-focused image. If the model doesn’t communicate a tangible outcome, cut it. Use that image slot to crush a buyer's objection instead.
Can I Just Use My iPhone for Cosmetic Photos?
For your hero image and any critical texture shots, the answer is a hard no.
The color accuracy, macro detail, and controlled lighting needed for a high-converting main image are beyond what a phone can reliably produce. A professional setup with the right lens and studio lighting is not an expense—it's a direct investment in your click-through rate and your brand's perceived value.
While a top-tier phone might work for a secondary "in-use" lifestyle shot if the lighting is perfect, your most important images demand professional execution. The same principles apply to other niche categories too -- if you sell supplements, our guide to Amazon supplement product photography covers the unique challenges of that space.
For brands needing to scale their product photography cosmetics without building a full studio, working with a specialized service is almost always more efficient. If you need a complete set of conversion-focused images for your cosmetics line, place an order with our team and we'll handle the research, design, and delivery in 2-3 business days.
At ProductShots, we create research-driven Amazon listing images designed to increase your conversion rate. Our one-time fee gives you a complete, optimized 7-image gallery that addresses your customer's biggest pain points, delivered in just 2-3 business days. Stop guessing and start converting by visiting us at https://azprodshots.com.
Ready to Upgrade Your Amazon Listing Images?
Get 7 research-driven images for your product. $400 flat fee, 2-3 day turnaround.
Get Your Images Now