Amazon Product Image Optimization: The Definitive Conversion Guide
March 15, 2026
Your Amazon Images Are Your Most Powerful Sales Tool. Start Treating Them That Way.
Let’s get one thing straight: your product images aren't just there to look pretty. They are your most powerful sales tool on Amazon. Yet, most sellers treat them as an afterthought. An effective amazon product image checklist isn't about getting creative; it's a strategic plan to build a visual sales pitch that directly impacts your bottom line.
Why Your Amazon Images Are Costing You Sales
Stop blaming your PPC budget or keyword strategy for flat sales. The hard truth? Mediocre images are the silent killer of your Amazon business. They cripple conversion rates and force you into a race to the bottom on price.
Your images are the first—and often the only—thing a shopper evaluates. They sell first. Copy sells second.
When your visuals fail to connect, the entire sales funnel collapses. Low-quality or unstrategic images create a domino effect:
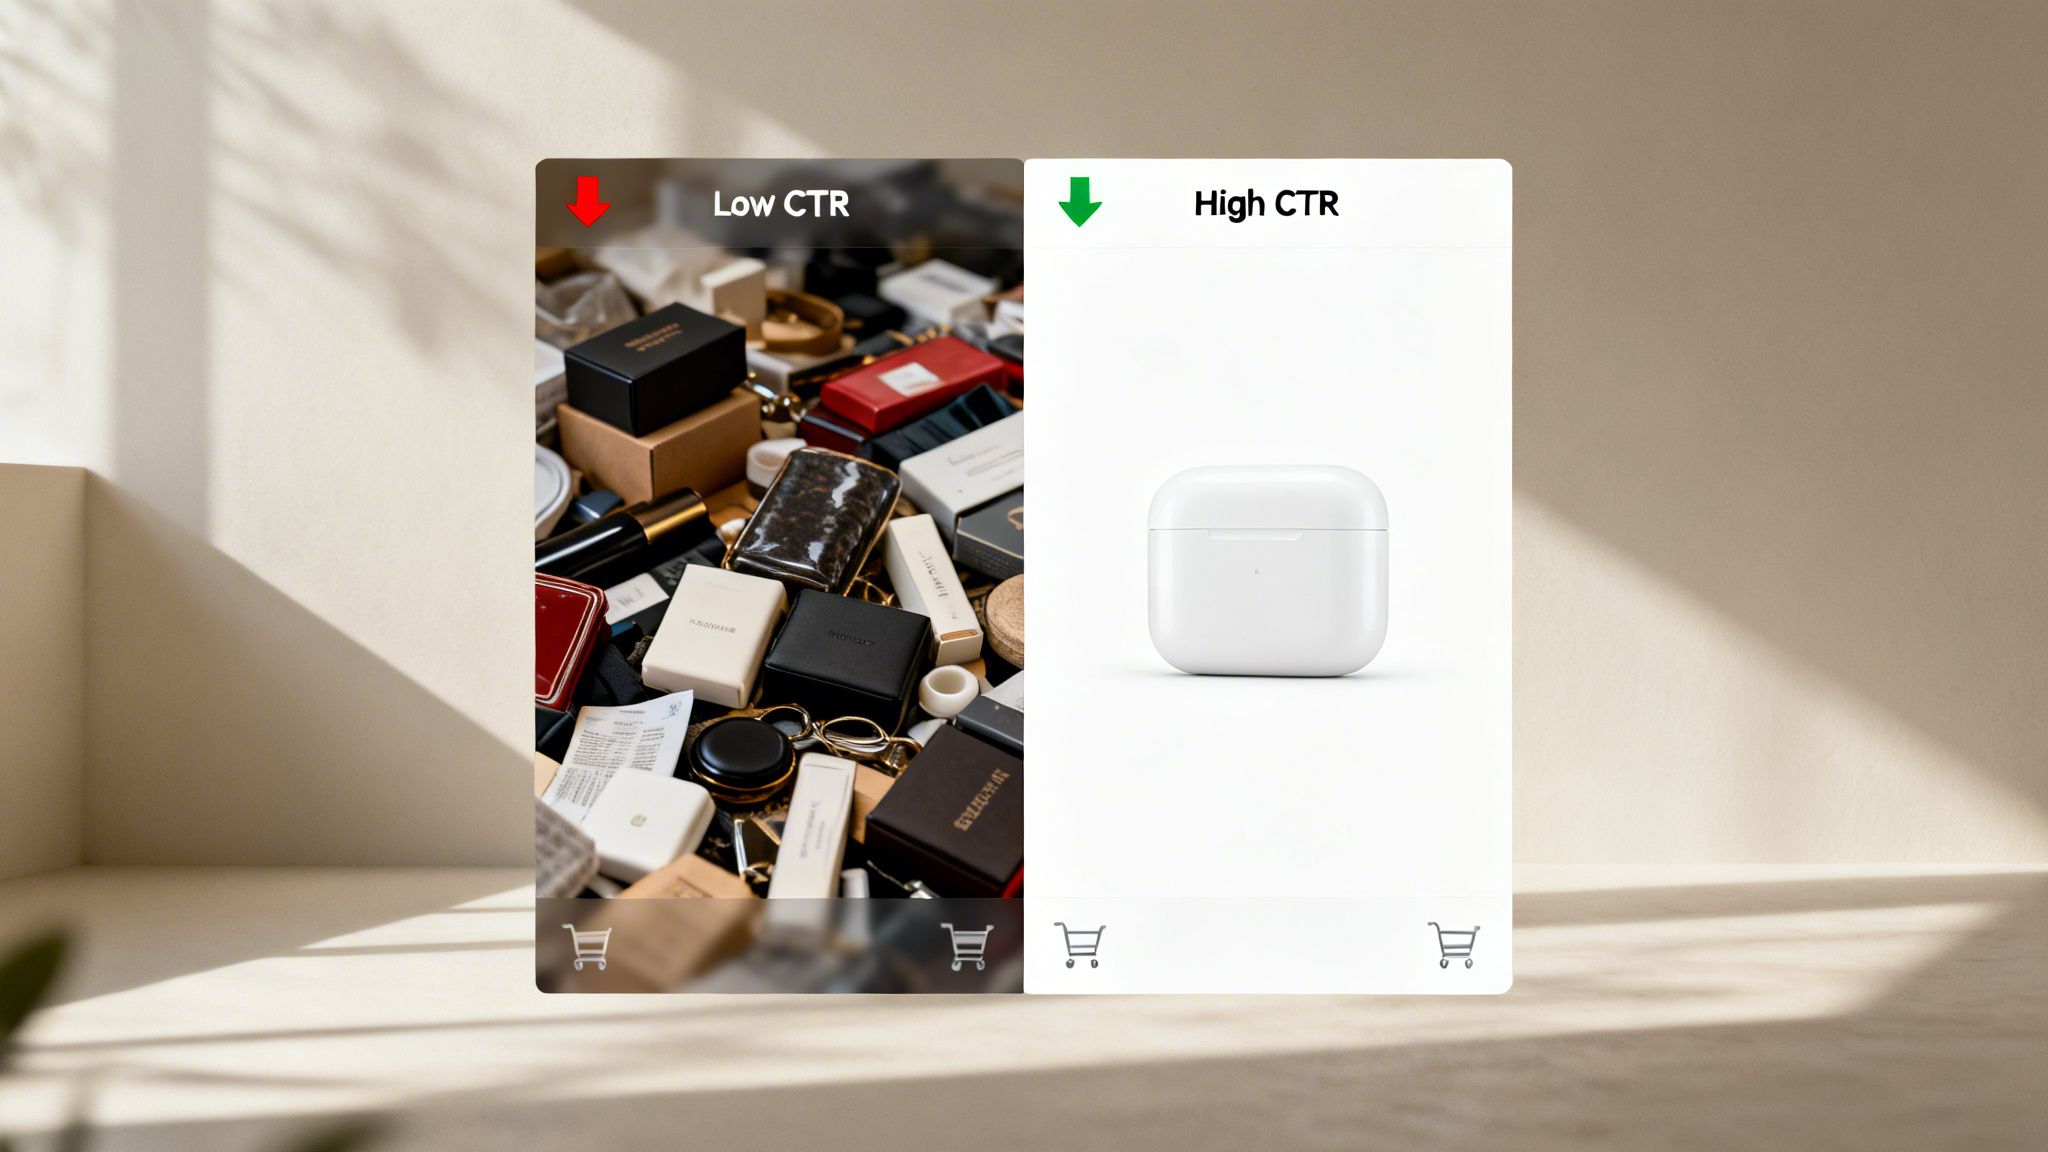
- Depressed Click-Through Rates (CTR): Your main image is fighting for attention on a crowded search results page. If it’s weak, shoppers scroll right past you, no matter how good your rank or reviews are.
- Wasted Ad Spend: You pay for every single click. If those clicks land on a product page with unconvincing images, shoppers bounce immediately. Your ACoS skyrockets while your sales go nowhere.
- Increased Price Sensitivity: Weak images scream low value. When your product looks cheap or untrustworthy, shoppers aren't willing to pay a premium. They’ll just default to your lowest-priced competitor.
The Strategic Shift: From Decoration to Conversion
The core idea of this guide is simple: a research-driven image stack is the definitive solution to underperformance. This isn't a creative exercise. It's about deploying visual assets tactically to answer questions, crush objections, and build desire before a shopper even thinks about reading your bullet points.
Your image set isn't a gallery; it's a sales pitch. Each of the seven image slots is a chance to address a specific customer pain point or highlight a key benefit discovered through meticulous research of reviews and competitor weaknesses.
Your image set isn't a gallery; it's a sales pitch. Each of the seven image slots is a chance to address a specific customer pain point or highlight a key benefit discovered through meticulous research of reviews and competitor weaknesses.
A powerful image strategy acts as a force multiplier. It makes your PPC ads more efficient, justifies a higher price point, and even improves your organic ranking by boosting your conversion rate (Unit Session Percentage).
Understanding the need for great visuals is the first step. If you really want to dig in, you can explore the principles of e-commerce photography that sells to get an edge. This checklist will give you the framework to turn your images from a liability into your greatest competitive advantage.
Mastering Amazon's Technical Image Requirements
Ignoring Amazon’s technical image rules is a rookie mistake that quietly bleeds sales. These aren't just arbitrary hoops to jump through. They are the non-negotiable cost of doing business on Amazon, ensuring your product is seen, clicked, and trusted.
Mess this up, and the consequences are swift. Your listing gets suppressed. Your main image gets rejected. You get flagged for a policy violation. Each of these outcomes kills your sales velocity and hands an easy win to your competitors.
The Anatomy of a Compliant Main Image
Your main image is your single most important visual asset. It's your storefront window on a crowded search results page. Amazon enforces its rules here with zero tolerance.
The rules are simple and ironclad: a pure white background (RGB 255,255,255), the product filling at least 85% of the frame, and a minimum size of 1000px on the longest side (aim for 1600-3000px). No text, no logos, and no extra props. For every spec in detail, see our full Amazon image requirements breakdown.
Break these rules, and your listing gets suppressed or rejected. A pure white background isolates the product, making it easy to compare. The 85% frame fill makes sure your product looks substantial, especially on mobile.
Common Mistake: Using an "almost-white" or light gray background. Amazon's automated systems will flag this, and your listing will disappear from search. The background must be pure RGB (255, 255, 255). No exceptions.
Common Mistake: Using an "almost-white" or light gray background. Amazon's automated systems will flag this, and your listing will disappear from search. The background must be pure RGB (255, 255, 255). No exceptions.
Before we dive deeper into file types and naming, here’s a quick reference table for the most critical technical specs. Keep this handy.
Amazon Image Technical Requirements At a Glance
This table breaks down the essential technical specs. Getting these right isn't just about avoiding suppression—it's about ensuring your images load fast and look great on every device.
Mastering these specs is the foundation that allows your strategic secondary images to convert shoppers.
Why Resolution and File Type Matter for Conversion
Amazon’s 1000-pixel minimum isn't random; it’s directly tied to the zoom function. Shoppers expect to zoom in and inspect details. If your image is too small, zoom is disabled, signaling low quality.
Always aim higher—1600px to 3000px is the sweet spot. This delivers a crisp zoom that builds confidence and helps justify a premium price.
Beyond pixels, getting the file details right saves you from headaches during upload.
- File Formats: Stick with JPEG. It gives you the best quality-to-file-size ratio for fast loading.
- Color Mode: Always use sRGB. If you upload an image in CMYK, the colors will look completely wrong online.
- File Naming: Name your files with the product identifier, a period, and the file extension (e.g., B00EXAMPLE.jpg). This is how Amazon’s system knows which image goes with which product.
Failing on these technical points leads to frustrating upload errors. If you want to ensure every detail is perfect without the hassle, working with a specialized service like https://azprodshots.com/ can be a smart move to get conversion-focused images that nail every single requirement.
A technically perfect main image doesn't just pass Amazon's checks—it earns more clicks, setting the stage for the rest of your images to close the sale.
Building Your Strategic 7-Image Sales Funnel
Your Amazon images shouldn't be a random collection of photos. They are a seven-part visual sales pitch, and each slot has a specific job: to walk a shopper from a casual click to a confident purchase.
Stop guessing and start planning. The most effective image stacks are born from research. Deep-dive into your market to find the pain points, desires, and deal-breakers that drive sales. Mine your competitor’s listings, customer reviews, and search queries for clues.
What are shoppers complaining about in your top competitor’s 1-star reviews? That’s a weakness you need to crush with an image. What do they rave about in 5-star reviews? That’s a feeling you need to sell with a lifestyle photo. This research is the strategic backbone of your entire visual presentation.
Mapping Research to Your Image Stack
Once you've done the homework, give each of your seven image slots a clear, conversion-focused job. Think of them as a sequence, with each image building on the last, systematically dismantling doubt and building value.
- Image 1 (Main Hero): This image has one job—get the click. It must be 100% compliant: pure white background, no text, and the product filling at least 85% of the frame. Its only mission is to stand out on a crowded search result page.
Image 1 (Main Hero): This image has one job—get the click. It must be 100% compliant: pure white background, no text, and the product filling at least 85% of the frame. Its only mission is to stand out on a crowded search result page.
- Image 2 (The "Why"): Immediately tell the shopper why your product is better. This is often a studio shot highlighting a key feature, premium material, or unique design. Use a short, punchy text callout pulled from your research to label this differentiator.
Image 2 (The "Why"): Immediately tell the shopper why your product is better. This is often a studio shot highlighting a key feature, premium material, or unique design. Use a short, punchy text callout pulled from your research to label this differentiator.
- Image 3 (Infographic 1 - Core Benefit): Address the single most important reason someone buys your product. Use a clean, mobile-friendly infographic to visually explain a primary benefit. For a blender, this might show how its blade design creates a smoother texture with a callout like "Velvet-Smooth Blends, Every Time."
Image 3 (Infographic 1 - Core Benefit): Address the single most important reason someone buys your product. Use a clean, mobile-friendly infographic to visually explain a primary benefit. For a blender, this might show how its blade design creates a smoother texture with a callout like "Velvet-Smooth Blends, Every Time."
- Image 4 (Lifestyle 1 - The Outcome): Show your product in a relatable, aspirational context. This isn't just about showing it in use; it's about selling the result of using it. A customer doesn’t just buy a yoga mat; they buy a moment of peace and wellness. Sell that feeling.
Image 4 (Lifestyle 1 - The Outcome): Show your product in a relatable, aspirational context. This isn't just about showing it in use; it's about selling the result of using it. A customer doesn’t just buy a yoga mat; they buy a moment of peace and wellness. Sell that feeling.
- Image 5 (Infographic 2 - Overcoming Objections): Tackle the biggest doubt or fear you found in your review mining. If customers worry a product is hard to assemble, show a simple, three-step visual guide. If they think it's fragile, show an image highlighting its durable construction.
Image 5 (Infographic 2 - Overcoming Objections): Tackle the biggest doubt or fear you found in your review mining. If customers worry a product is hard to assemble, show a simple, three-step visual guide. If they think it's fragile, show an image highlighting its durable construction.
- Image 6 (Social Proof or Comparison): Build trust and stop the shopper from opening another tab. This can be a comparison chart showing how your product stacks up against a generic alternative (never call out a specific competitor). A "What's in the Box" image also works well here.
Image 6 (Social Proof or Comparison): Build trust and stop the shopper from opening another tab. This can be a comparison chart showing how your product stacks up against a generic alternative (never call out a specific competitor). A "What's in the Box" image also works well here.
- Image 7 (Lifestyle 2 - The Brand Promise): End on a powerful brand image. This final shot should reinforce the aspirational outcome and create an emotional connection. It’s your last chance to make the shopper feel this product is the right choice for them.
Image 7 (Lifestyle 2 - The Brand Promise): End on a powerful brand image. This final shot should reinforce the aspirational outcome and create an emotional connection. It’s your last chance to make the shopper feel this product is the right choice for them.
This framework transforms your images from passive placeholders into active salespeople working for you 24/7.
The Power of a Structured Visual Funnel
Following this structured approach forces discipline. It stops you from creating seven beautiful but strategically useless images. Each slot must justify its existence by doing a specific job in the conversion process.
A well-architected 7-image stack doesn't just show your product; it tells a story that anticipates and answers a customer's most pressing questions. It moves them from "What is this?" to "I need this" in a matter of seconds.
A well-architected 7-image stack doesn't just show your product; it tells a story that anticipates and answers a customer's most pressing questions. It moves them from "What is this?" to "I need this" in a matter of seconds.
This visual flow is even more critical on mobile, where shoppers scroll quickly and have zero patience for confusing information. The visual hierarchy you create has to be crystal clear. This is a core part of any effective amazon product image checklist.
The diagram below shows the basic compliance flow that underpins your main image, ensuring it passes Amazon's checks without a hitch.
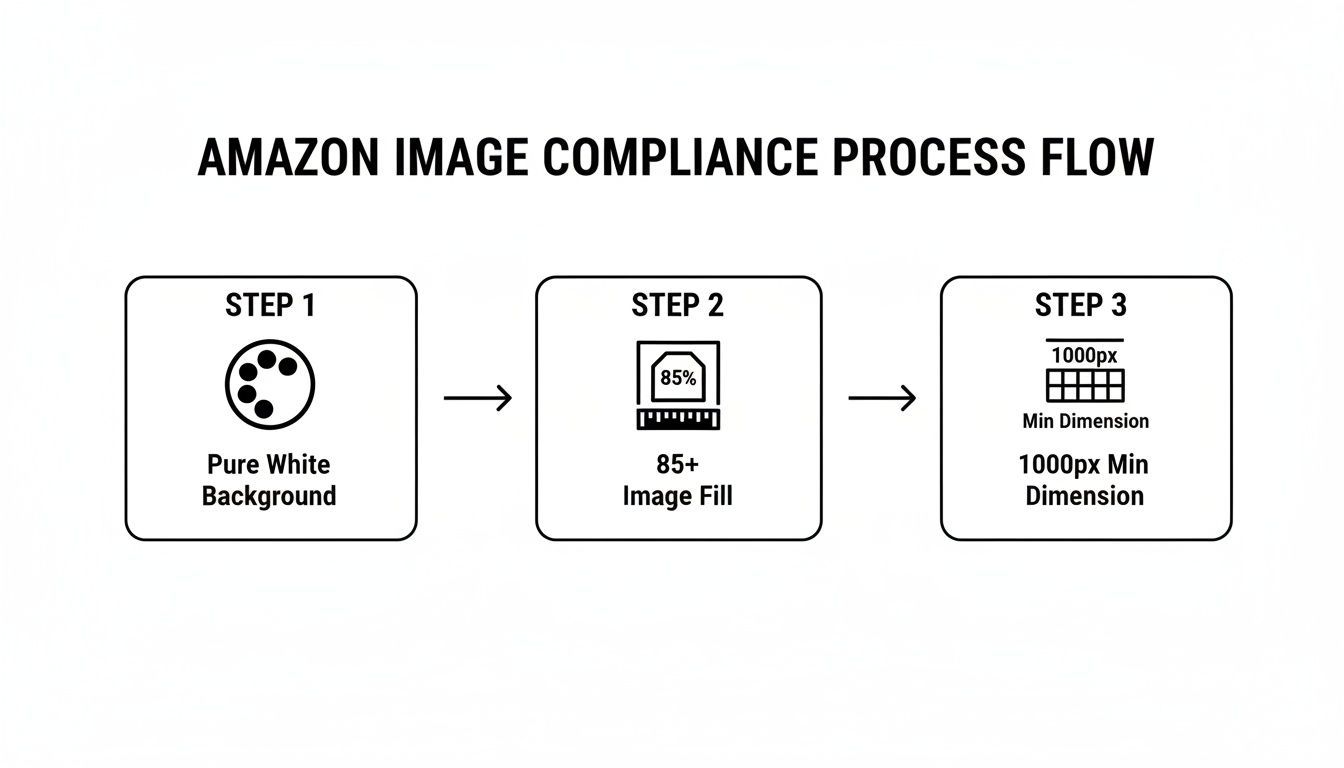
This visual process—ensuring a pure white background, 85%+ frame fill, and a 1000px minimum dimension—is the non-negotiable entry ticket for getting your main image approved.
By dedicating each secondary image to a specific sales job, you build a powerful, logical argument for your product. This method moves you beyond simply showing what your product is and lets you prove what it does for the customer.
Designing Secondary Images That Convert Shoppers
You have your strategic plan. You know which pain points and benefits to hit. Now you have to execute. A brilliant strategy is worthless if the final visuals are cluttered, unreadable on a phone, and fail to connect.
This is where many sellers stumble. They cram too much into one image, use tiny fonts, or use generic stock photos. The goal is to make the ‘Add to Cart’ click feel like the most obvious next step. Your images need to answer questions before the shopper even thinks to ask them.
One Image, One Powerful Benefit
The most important rule for secondary images is visual hierarchy. You have a split second to land a message on a small screen. If an image tries to shout three things at once, the shopper hears nothing.
Assign one core benefit or feature to each secondary image. This ruthless focus is what gives your message clarity and punch.
- Image 2: This is for your product's #1 differentiator. A clean studio shot with one bold text callout is perfect.
- Image 3: This should show the main functional benefit. It's your first infographic—keep it dead simple with icons and minimal text.
- Image 4: This is where you sell the emotional payoff. Use a lifestyle shot to show the feeling of using the product, not just the product being used.
This approach walks the shopper through a logical argument, preventing the confusion that sends buyers bouncing off your page.
Crafting Text That Sells, Not Just Tells
The text on your images is micro-copy built to convert. Your customer review research is a goldmine for this. Lift phrases and keywords directly from what your audience is already saying.
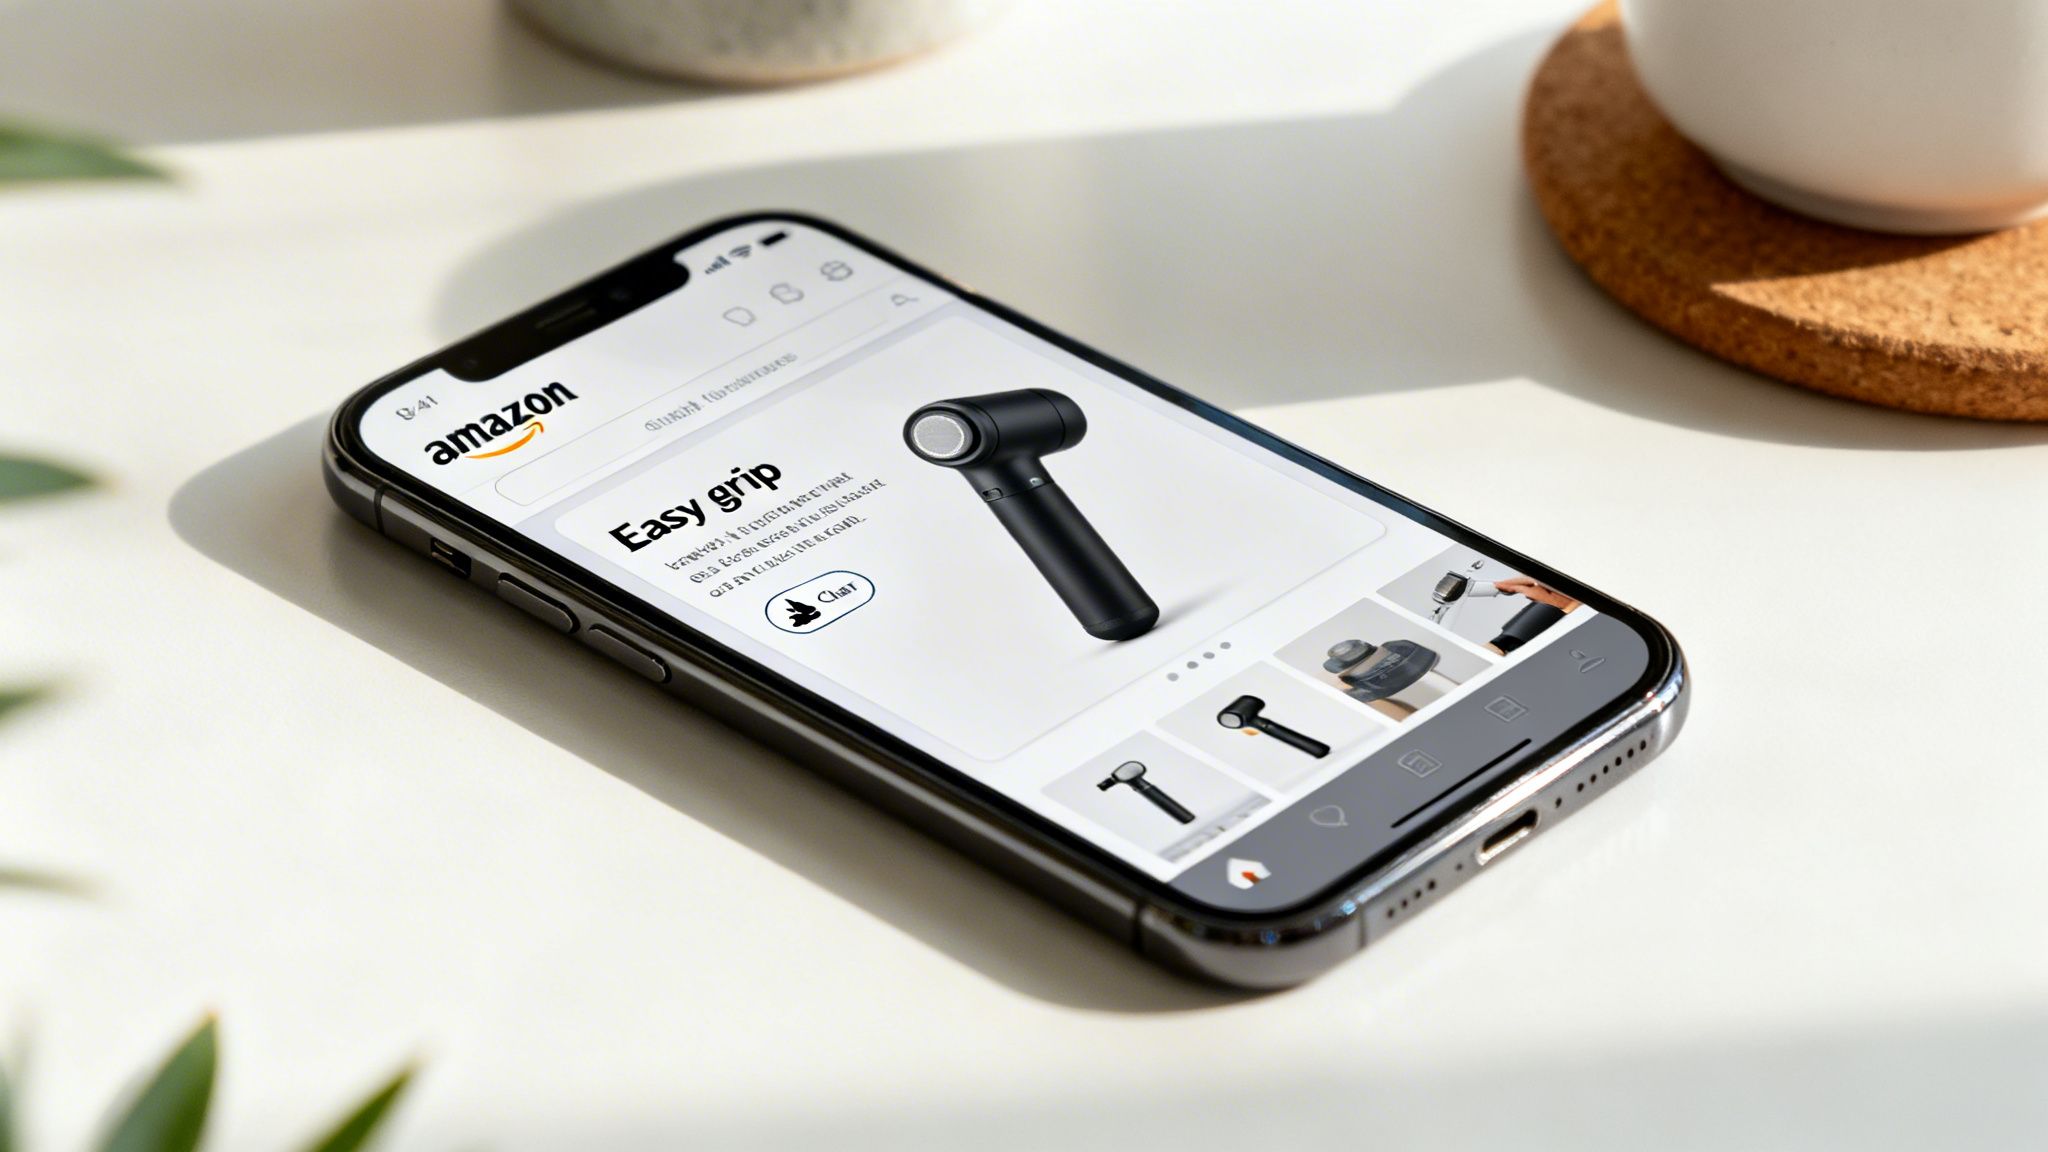
If reviews mention "finally, a handle that's easy to grip," your text callout should be "Easy-Grip Handle." It's not about being clever; it's about showing the customer you understand them.
Common Mistake: Using tiny, decorative fonts that are unreadable on a smartphone. Stick with a bold, clean, sans-serif font, and make sure the text is big enough to read at a glance.
Common Mistake: Using tiny, decorative fonts that are unreadable on a smartphone. Stick with a bold, clean, sans-serif font, and make sure the text is big enough to read at a glance.
This is a non-negotiable part of any amazon product image checklist. Before you sign off on any design, pull it up on your phone and hold it at arm's length. If you have to squint, it's a failure.
Authentic Lifestyle Images Build Trust
Generic stock photos are a conversion killer. Shoppers can spot them a mile off, and they instantly destroy trust. Your lifestyle images must feel authentic, aspirational, yet relatable.
A poorly done lifestyle shot doesn't create desire—it creates skepticism.
- Use real environments: Show the product in a setting that looks like a real home.
- Focus on the result: The person in the photo should look happy, relieved, or confident because of your product. Sell the solution.
- Match your demographic: The models and settings must reflect your target customer. A mismatch breaks the connection immediately.
Remember, filling all seven slots with strategic visuals isn't optional for serious sellers. Designing these images is a balancing act of blending strategic insights with clean, mobile-first design. For more advanced strategies, see our deep-dive on Amazon main image optimization and the complete Amazon listing optimization guide. Each image must be a deliberate step in your sales process, guiding the shopper closer to purchase with absolute clarity.
The Final Pre-Launch Quality Assurance Protocol
All the strategic work—competitor teardowns, review mining, infographic planning—can be wiped out by one sloppy mistake during upload. Your final quality assurance (QA) check is the last line of defense. Treat this step like a final factory inspection.
A single typo, a mislabeled file, or an image that renders poorly on mobile can kill trust instantly and send a shopper straight to your competitor. Before a single image file touches Seller Central, it needs to pass a tough, multi-point inspection.
The Technical File Audit
First, the critical technical stuff. If you mess this up, you’ll either get upload errors or, worse, Amazon will map your images to the wrong ASINs—a nightmare for anyone managing variations.
Your pre-upload technical check should confirm:
- File Naming Convention: Is every file named correctly? Product Identifier + Period + Extension (e.g., B00EXAMPLE.MAIN.jpg or B00EXAMPLE.PT01.jpg). Naming a file image_1_final.jpg is asking for trouble.
- File Format: Are all images saved as JPEGs? JPEG gives you the best balance of quality and file size for faster load times.
- Color Mode: Is every single file in sRGB color mode? An image in CMYK will show up with bizarre, sickly colors on Amazon.
- Resolution and File Size: Double-check that every image is at least 1600px on its longest side to enable zoom. At the same time, ensure files are optimized for the web (ideally under 500kb) to prevent slow loading.
This audit prevents the most common launch day headaches.
Content and Compliance Verification
Once the technicals are locked in, review the content itself. This is where you confirm that the strategic messaging has been executed perfectly. Pull up each image on both a desktop and your phone.
Your images are a commercial promise to the customer. A claim made in an infographic that doesn't match the product's actual performance is grounds for negative reviews and returns, directly impacting your bottom line and account health.
Your images are a commercial promise to the customer. A claim made in an infographic that doesn't match the product's actual performance is grounds for negative reviews and returns, directly impacting your bottom line and account health.
Proofread every word on your infographics. Hunt for typos and grammar mistakes. Fact-check every claim. If your image says the product "Holds up to 50 lbs," you better be sure that's accurate.
Finally, check for consistency. Does the product color in your lifestyle shot match the hero image? Do the features in your infographics line up with your bullet points and A+ Content? Any disconnect creates doubt.
After investing in a professional visual strategy, a self-inflicted wound from a preventable error is the last thing you want. You can see how an integrated research and design process prevents these issues from the start by ordering a complete, pre-vetted image package. This final QA step is your stamp of approval, ensuring every image launches perfectly and drives sales from day one.
Testing and Optimizing Your Images for Peak Performance
Getting a new set of strategically planned images live is just the beginning. The real work starts now.
Too many sellers treat their images like static files. They upload them and move on. But your images are dynamic performance assets. This isn't a "set it and forget it" game.
Using Data to Drive Image Decisions
The single most important metric you can influence with your main image is its click-through rate (CTR). A higher CTR means more shoppers are picking your product out of a crowded search results page, which fuels sales and improves your organic rank.
The best way to test your main image is with Amazon's own A/B testing tool, Manage Your Experiments. It’s a straightforward feature that lets you run a head-to-head competition between your current hero image and a new variation to get real data on what drives clicks.
For example, you can test:
- Does a different angle grab more attention?
- Will a punchier color grade make it pop against the competition?
- Does a tighter crop stop the scroll more effectively?
Run one experiment at a time to get clean data. After a few weeks, Amazon will tell you which image performed better.
Your secondary images are your conversion engines. Their performance is measured by your Unit Session Percentage—your conversion rate. If you roll out a new image stack and see that number go up, you know your new visuals are doing their job of answering questions and knocking down purchase barriers.
Your secondary images are your conversion engines. Their performance is measured by your Unit Session Percentage—your conversion rate. If you roll out a new image stack and see that number go up, you know your new visuals are doing their job of answering questions and knocking down purchase barriers.
This cycle of testing, learning, and refining is how you win. A tiny 1% increase in your main image CTR or your overall conversion rate can have a massive impact on your revenue and profit.
Constantly iterating on your visuals, guided by hard data from your business reports and experiments, is how you stay ahead. This is a core part of a professional amazon product image checklist.
Frequently Asked Questions
Even experienced sellers get stuck on image strategy. Let’s tackle some of the most common questions.
Do I Really Need All Seven Images?
Yes, you absolutely do. Listings with a full set of images simply convert better. Shoppers are wired to expect a complete visual story. They want to see the product from every angle, understand its real-world use, and mentally place it in their own lives.
Every empty image slot is a missed chance to answer a buyer's question or knock down a purchasing barrier. That directly hurts your Unit Session Percentage.
What Is the Most Common Mistake with Secondary Images?
By far, the biggest mistake is visual clutter. Sellers try to cram everything into one image—a laundry list of features, huge blocks of text, and complicated graphics. On mobile, where you have maybe two seconds, this is a total conversion killer.
The rule is simple: one image, one core message. Anything more just creates confusion, and confusion kills sales.
How Often Should I Update My Amazon Images?
Your images aren't a "set it and forget it" asset. You should be ready to refresh them or test new variations anytime you see a meaningful dip in your conversion or click-through rate.
It’s also critical to re-evaluate when your top competitors level up their visual game. If their images suddenly look better than yours, you're at risk. Finally, constantly mine your customer reviews for new insights into what buyers actually care about—that’s gold for your next image update. If you need a second pair of eyes on this, get in touch with our team and we can dig into your specific situation.
Ultimately, your images are a living sales tool. The top 1% of sellers are the ones who are constantly testing and optimizing. Everyone else is just guessing.
Ready to Upgrade Your Amazon Listing Images?
Get 7 research-driven images for your product. $400 flat fee, 2-3 day turnaround.
Get Your Images Now